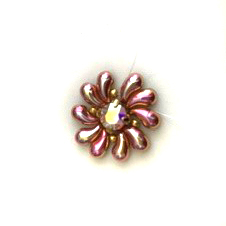
Jacqui gives us the lovely concept of a Love Knot worked in one of the most distinctive new beads, the ZoliDuo. She's turned this love knot into a ring which I'm sure will be as fun to wear as to make. What color will yours be? Marcia
Supplies:
10 ZoliDuo Beads (Right) Czech
2g. 11° seed beads Miyuki
1g. 15° seed beads Miyuki
1 ss29 Rose Montee Swarovski 1088 in sew on setting (2 parallel holes)
8# Fireline Beading Thread
Size 11 Beading Needle
Step by Step Instructions:
Stitching the LOVE KNOT RING face:
- Thread your needle with approx. 36 inches of thread, add a stop bead and leave a 6 inch tail.
Pass your needle through the left side holes of the rose montee setting, and string 2 zoliduo beads through the pointed end of the beads, and pass down through the right side holes of the rose montee setting. (Fig. 1)
Repeat this stitch to the opposite side of the rose montee setting, and exit the top hole of the rose montee setting where you began. (Fig. 1)
- Pass your needle through the adjacent zoliduo bead, and string 3 zoliduo beads through the pointed end of the beads.
Pass through the 2 adjacent zoliduo beads added in Step 1, and repeat this step to the opposite side of the rose montee. (Fig. 2)
- Pass your needle through the pointed end of the 2 adjacent zoliduo beads, and string 1-11° seed bead.
Continue around the rose montee, passing through the pointed end of the zoliduo beads, adding 1-11° seed bead between each set of zoliduo beads added in Steps 1-2,
for a total of 4-11° seed beads added. (Fig.3)
Exit between the second zoliduo bead added in Step 2.
- Reverse direction, and pass through the top hole (round edge) of the zoliduo bead. Working through the top holes of the zoliduo beads, string 1-11° seed bead, pass through the adjacent zoliduo bead. Continue added 1-11° seed bead in this manner through all 10 zoliduo beads, for a total of 10-11° seed beads added. (Fig. 4)

Exit the first 11° seed bead added in this Step, and the adjacent zoliduo bead and reverse direction.
- Adding the “KNOT- STITCH” EMBELLISHMENT:
Pass through the pointed end of the zoliduo bead, through to 1-11° seed bead added in Step 3. String 8-15° seed beads, lay the beads over the 2 zoliduo beads, and pass through the 11° seed bead added in Step 4. Continue to pass through the top hole of the adjacent zoliduo, 1-11°, (top hole) zoliduo, 1-11° , (top hole) zoliduo, and 1-11° seed bead. Then pass down to 1-11° seed bead added in Step 3 between the zoliduo beads. (ref. Ring photo for detail)
- Repeat Step 5 one more time working in the same direction. When completed, reverse direction and repeat Step 5 twice to complete the Knot-Stitch embellishment.
- Stitching the LOVE KNOT RING band:
Begin stitching one side of the ring band by setting up a 2-bead flat herringbone stitch for 5 rows, at 1 - 11° seed bead on both sides of 1 zoliduo bead added in Step 4.
(Fig. 5)
- Join each 2-bead split at row 5, and continue with a 4-bead flat herringbone stitch for the remaining stitches to determine your desired length of the band.
Note when determining the length of your band, allow for the 5 rows of 2-bead flat herringbone stitch (Step 7) you will add to attach the band to the opposite side of the ring. (Fig. 6)
For printable directions click here.JLH Designs Jacqui Higgins
A bit of history about the LOVE KNOT:
The term true lover’s knot, also called true love knot is used for many distinct knots. The association of knots with symbolism of love, friendship and affection dates back to antiquity.
Knots in jewelry and their particular focus as a symbol of eternity and love are rare ancient concepts that span both the East and West. We’re blessed with how prolific they are in mourning and sentimental items for the very nature of their symbolism, but their appearance in different permutations in cultures is ubiquitous and strangely correlating with concurrent meanings.
There are quite a few variations on the knot, one of the more popular being the Celtic knot, which is dated to around 450 CE, which is often referred to as the “mystic knot” or the “endless knot”. In this, there is the allusion to birth and rebirth. The expression “tying the knot” is thought to be where the couple had their hands bound in an endless knot as part of the wedding ritual.
Then there is the knot as a primary focus, which is very typical in rings and necklaces. The knot is most often seen with the Celtic influences, but many second-half 19th century rings retained a knot motif, often seen as a twist, in various styles and materials. Knots in necklaces were also popular from the 1860’s onwards, with the necklace itself twisting into a knot around the chest. Chains were also tied into the concept of knots, used in bracelets, necklaces, links in fob chains and other items as well.
1 Wikipedia
2 Various sources
3 Various sources


No comments:
Post a Comment